
Create an Advertiser
Advertisers are retail clients that sign up under a white label reseller that communicate with end-users through the use of various tools available on our system.
Here is a step by step guide on how to create an advertiser on your administrator dashboard:
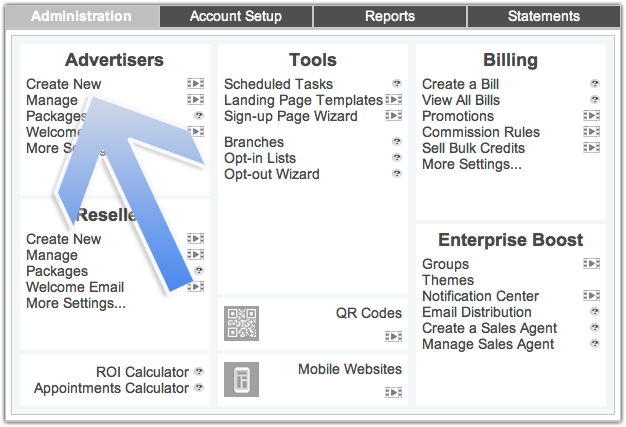
- First, click on "Create New" under advertisers on your administrator dashboard.
- Next, fill in each box according to the specific reseller’s information.
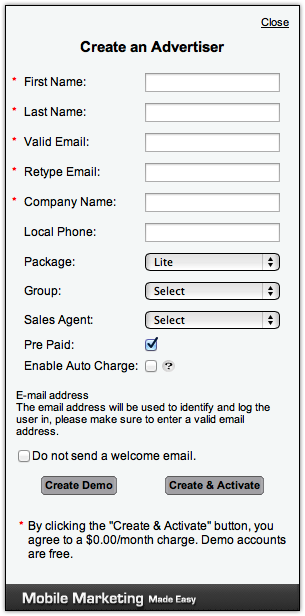
- First Name - First name of advertiser
- Last Name - Last name of advertiser
- Valid Email - Advertiser's active email address (must be a unique email address)
- Retype Email - Confirm the advertiser's email address
- Company Name - The advertiser's company name (No longer has to be unique on the platform)
- Local Phone (optional) - Contact number of the advertiser
- Package - Assign advertiser to a specific Package to the advertiser
- Group - Assign advertiser to a specific feature Group
- Sales Agent - Assign the advertiser to a Sales Agent
- Pre Paid - When checked, the advertiser pays for the entire month up front. When unchecked, the advertiser pays for the previous month's usage at the beginning of the following cycle.
- Enable Auto Charge - When checked, the platform will automatically charge the advertiser's credit card each billing cycle.
- Do not send a welcome email - When checked, the welcome message containing the username and password of the advertiser will not be delivered to the advertiser's email address.
When finished you can either choose ‘Create Demo’ or ‘Create and Activate’.
Choosing create demo will create an unactivated demo account with limited functionality and included credits.
Choosing create and activate will create a full account that uses the packages settings for pricing and limitations.
Watch our video tutorial below:
Comments
0 comments
Article is closed for comments.